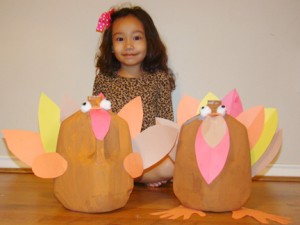
As we all know Thanksgiving is just around the corner. So I thought, what would better than to make our own crafty turkeys. Only we will be making them with old milk jugs.
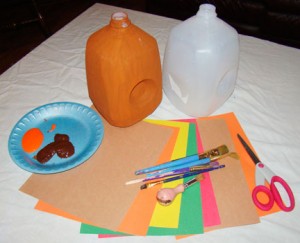
Supplies:
Milk Jug
Paint
Paintbrushes
Construction Paper
Glue
Pom Poms
Felt
Scissors
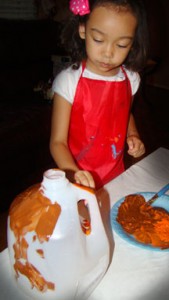
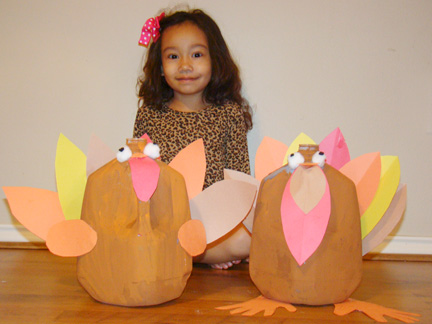
The first thing to do is rinse out your milk jug and then let it dry. Once it is dry, paint the milk jug. We painted ours with a mix of orange and brown colors.
Then, cut out feathers for the turkeys tail. When Sophia asked how are we going to make feathers, and I told her we will cut out pointy ovals to make them. Then she kept singing “pointy, pointy, pointy”.
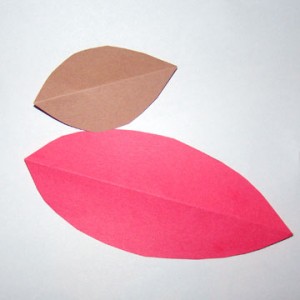

Place your feathers together and fan them out. Then, glue them all together at one end and attach to the back of the milk jug (the side that is away from the handle) and close to the bottom. Now it’s time to make the wings. Cut out two smaller, “pointy” ovals and glue them to both sides of the milk jug. Next, take some black felt or construction paper and make two small circles for eyes. Then, glue them onto the pom poms. After you make the eyes, glue them at the top of the handle on both sides.
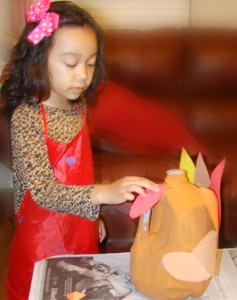
Now, it is time to make the wattle, which is the red part that hangs under a turkeys chin. To make that take your red construction paper and cut a skinny tear drop shaped piece. Then, glue the wattle just under the eyes and around the handle.
Finally, cut out a small orange triangle and glue it on top of the wattle, right under the eyes. There you have it your own Milk Jug Turkey. Oh, Sophia said what about the turkeys feet mama? So, I had Sophia trace her hands on some orange construction paper, and then we cut them out and placed them on the bottom of the milk jug. Now, we have our very own turkey, she said.

Now, what are you waiting for, go and make your own Milk Jug Turkey Craft! Remember have fun with it.
Sincerely,
![]()


Oh – SO CUTE! I am totally bookmarking this page! My daughter would LOVE to do this…Thanks so much for sharing!
Such a great idea – going to share this with Liam’s preschool teacher!
Aww sooo cute!!
These are so cute! My son would love to make one of these!
That’s really cute! Thanks for the idea!
Very cute. Nice job 🙂
What a fun craft idea!!
What a great project! My son is too young to do something like this, but for next year he might be able to help.
Emy
http://alwaysaroundboys.blogspot.com
Cute blog! I’m not a mommy, but I do have nieces and nephews to craft with. I love this blog design and how well-edited the content is. The craft is cute- better than hand-turkeys!
I found you from “Welcome Wednesday” and I shall follow!
We will be trying this over the weekend (have to drink enough milk and baby water for 3 jugs). I promise my kiddos will thank you for this share.
These are so cute. I want one for my Thanksgiving table!!!!!!!!!!!!!!!!
That is too cute! I love all the projects you do!
Hi,
I really like your blog!:) Following back from http://berdinetjapsi.blogspot.com/
Isn’t she precious. That’s a great tutorial you put together. You’d better watch it Monique or she’ll have her on blog going before you know it.
Hugs…Tracy 🙂
OMG……. that is brillant! I love those turkeys and thank-you for posting the great idea!
What a great idea!! I bet she had a good time making those! She is way too cute!
Now this is just too cute! We might do it next week as a family activity. Thanks for sharing!
OMG! These are too cute! thanks for sharing. I will have to remember this for next year. I know my kids would love it. I’m your newest follower from Simply Sunday blog stroll. You can find me at
http://canadiancouponmom.blogspot.com/
Those are so cute and easy! Sure beats making your handprint into a turkey. 😉 I’m a new follower.
AWW! What a cute craft! Happy Thanksgiving!
Hello, it is Glenda and I appreciate you following me. I Love this craft it will be something I can do with my son. I will be back as I am trying to do more with him as he will be three in a couple days. I Love the Blog and I am glad I found it.
I am bookmarking this idea for November. Brilliant and so cute!
New follower to your blog! 🙂