
![]()
Since it is starting to get a little colder lately, I decided to make a fleece blanket for my little boy William. I made a tied cupcake fleece blanket for Sophia a year ago and she is still uses it. All you have to do is have a sewing machine, and a few of the following supplies at hand.
Supplies:
- Fleece Fabric (which ever you desire and I used 2 coordinated colors. 2 yards and a little more for initial)
- Scissors
- Thread
- Measurement tape
- Letter (I went with W)
- Pins
![]()
You can find fleece fabrics just about anywhere. Several places I can think of would be (Hobby Lobby, JoAnn’s, and Hancock Fabrics). Some of these fabric stores might have some discounts or special sales going on, so make sure to go and take a look.
Now let’s begin with the tutorial. I bought 2 yards of dinosaur fleece and 2 1/4 yards of the checkered fabric as well. The little extra fabric is for the initial. This will coordinate just nicely and I know that William will love the checkers a lot. I pretty much placed both fabrics on top of one another, and then I cut them out evenly. I measured from the edge 3 inches and pinned it all the way around. Then I sewed it.
![]()
Once it was finished, I placed the W initial on a piece of the checkered fabric and cut it out. Then I placed it on top of the dinosaur fabric. Next I sewed it all the way around. I basically turned the fabric to the other side which showed the checkered side and literally cut through the sewed W. This will allow you to see the W in the dinosaur fabric too. So, now both sides of the blanket have the initial W.
![]()
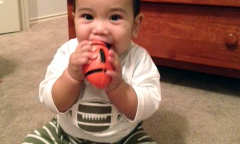
Finally, it was time to cut individually strips all around the blanket. You can tie them, or you can just leave it. I left it is this way, because it looks great and I already made one that was tied. I made sure that there was no thread hanging loose, cut away everything and it was done and ready for little William to enjoy. Oh, he just loves his new blanket made by mommy.
![]()
Now, it is time for you to enjoy your own blanket. Come back to see more of of my tutorials.
Have a great day!
![]()
8 Comments
Such a cute idea. I loved reading your tutorial and will share it.
What a great idea and a super cute baby! Love that smile!
You make it look so easy!
I have been wanting to get a sewing machine for a long time. Really wish I was better at sewing crafts!
Very cute blanket AND little guy!
You are so crafty. The blanket is cute and your son is adorable.
I am going to make my new grandson one of these blankets before he gets here. They are so cute and look very easy. I love the little addition of the initial!
I have made quite a few of these- I love how easy the fleece is to both work with and how easy it is to sew!